- Published on
WordPress the easy way – AWS
- Authors

- Name
- Aleksandar Zeljković
- @a_zeljkovic
Recently, I had to make a tough decision: where to host a WordPress blog. For a small-scale WordPress website, major cloud providers are usually an overkill, since you can find a lot of user-friendly, cheap, and simple solutions that provide just enough features for users who just want to deploy their website with a couple of clicks. If you don’t want to deal with a compute capacity, install PHP and MySQL, install certificates and configure DNS there is absolutely no reason to go down that road. Anyhow, my use case was a bit different, I was ready to get my hands dirty, wanted everything under my control, wanted to be able to scale, and since I’m starting a few other cloud-related projects I wanted to have all my costs and configuration under the same umbrella. This is the reason why I did an investigation on how can I spawn a WP instance in a fairly simple manner, but on a major cloud provider (in this case, AWS).
[If you are interested in how to easily deploy WordPress on Google Cloud Platform, you can read part 2 here: https://www.zeljkovic.sh/blog/2021/wordpress-the-easy-way-gcp]
WordPress on AWS
The simplest solution to create a WordPress instance on AWS is an Amazon Lightsail, a VPS service created to simplify the deployment and setup of different projects.
Lightsail is ideal for simpler workloads, quick deployments, and getting started on AWS. It’s designed to help you start small, and then scale as you grow. — AWS
Sounds perfect! Let’s see what we have to do to get it up and running.
Set the appropriate permissions
First, let’s create a policy that will allow Lightsail access:
{
  "Version": "2012-10-17",
  "Statement": [
    {
      "Effect": "Allow",
      "Action": ["lightsail:*"],
      "Resource": "*"
    }
  ]
}
This policy will enable access to Lightsail resources/actions. Afterward, you can set tags to the policy if you want, name it (eg. LightsailFullAccessPolicy), and create the desired policy. The next step is the creation of a dedicated user group for Lightsail access (eg. LightsailFullAccessGroup). You need to attach the access policy that you created above, and if you already have a user to whom you want to give Lightsail access, you can assign him to the group immediately. As soon as you’re done, you can try to access the Lightsail. If permissions are not set correctly you will see something like this:
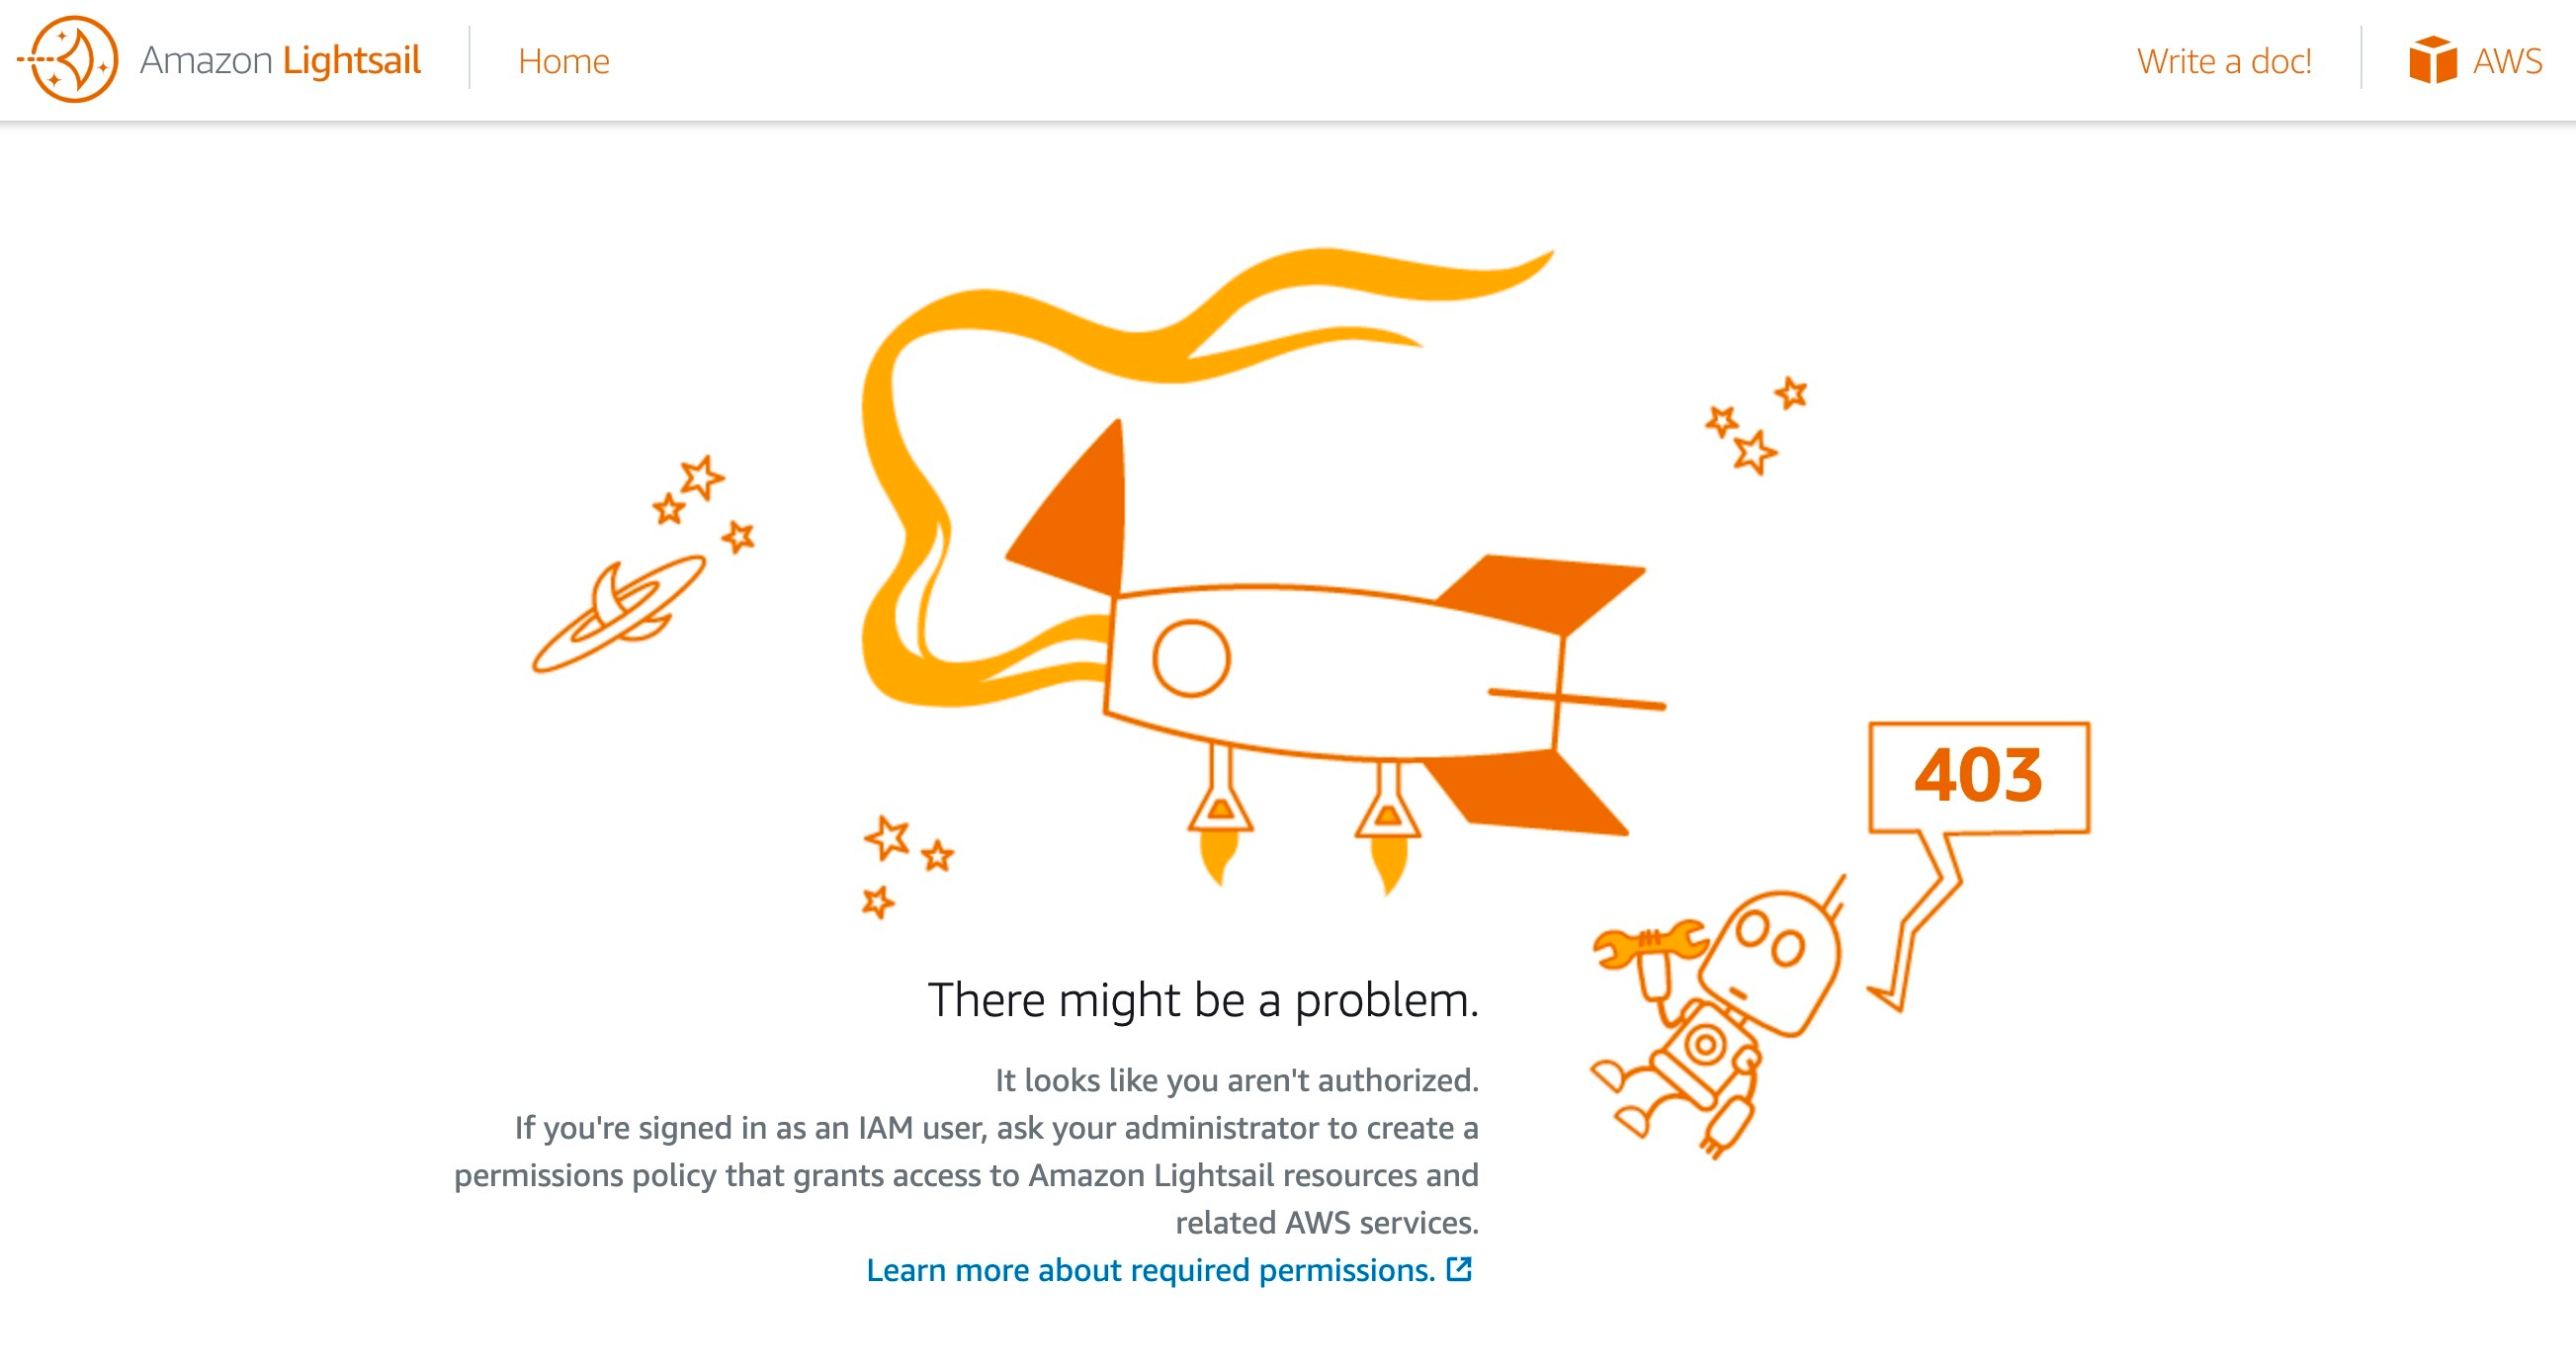
Otherwise, if things have been set up correctly, the language selection screen appears, and we are ready to proceed.
Instance creation
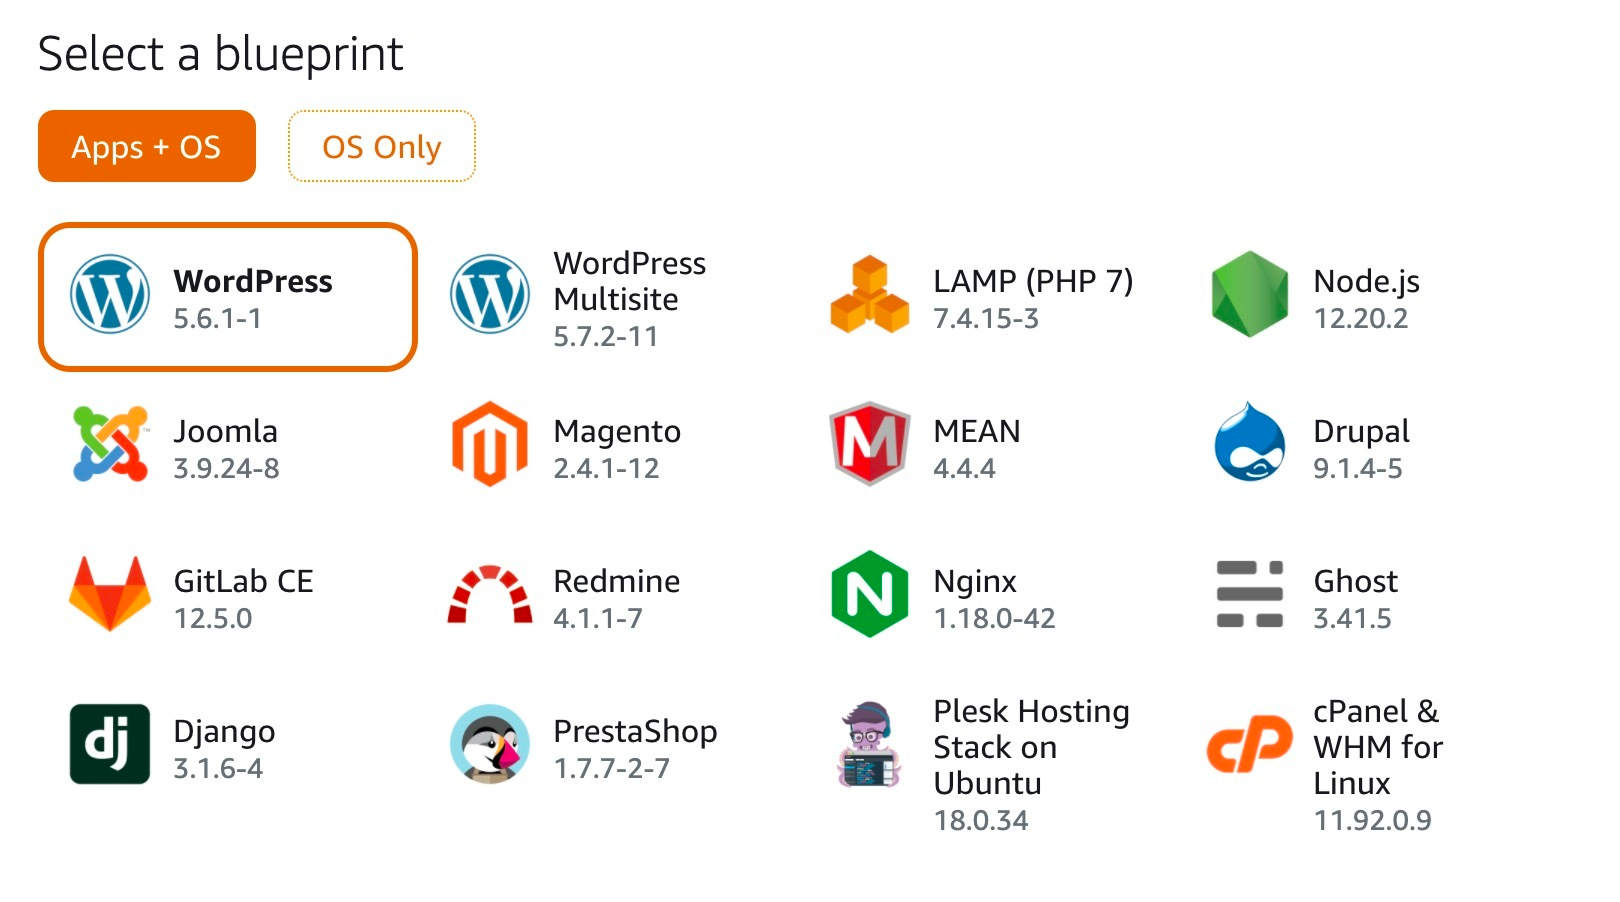
The setup of the instance on Lightsail is quite simple and it’s done through the wizard where the user needs to select:
- instance location
- platform
- a blueprint (it can be an OS or a pre-built application)
- instance plan
- instance name
- number of instances
Instance location should be one of the supported locations which is the closest to users. Blueprints offered by AWS are some of the most often used services like WordPress, Nginx, Node.js, etc.
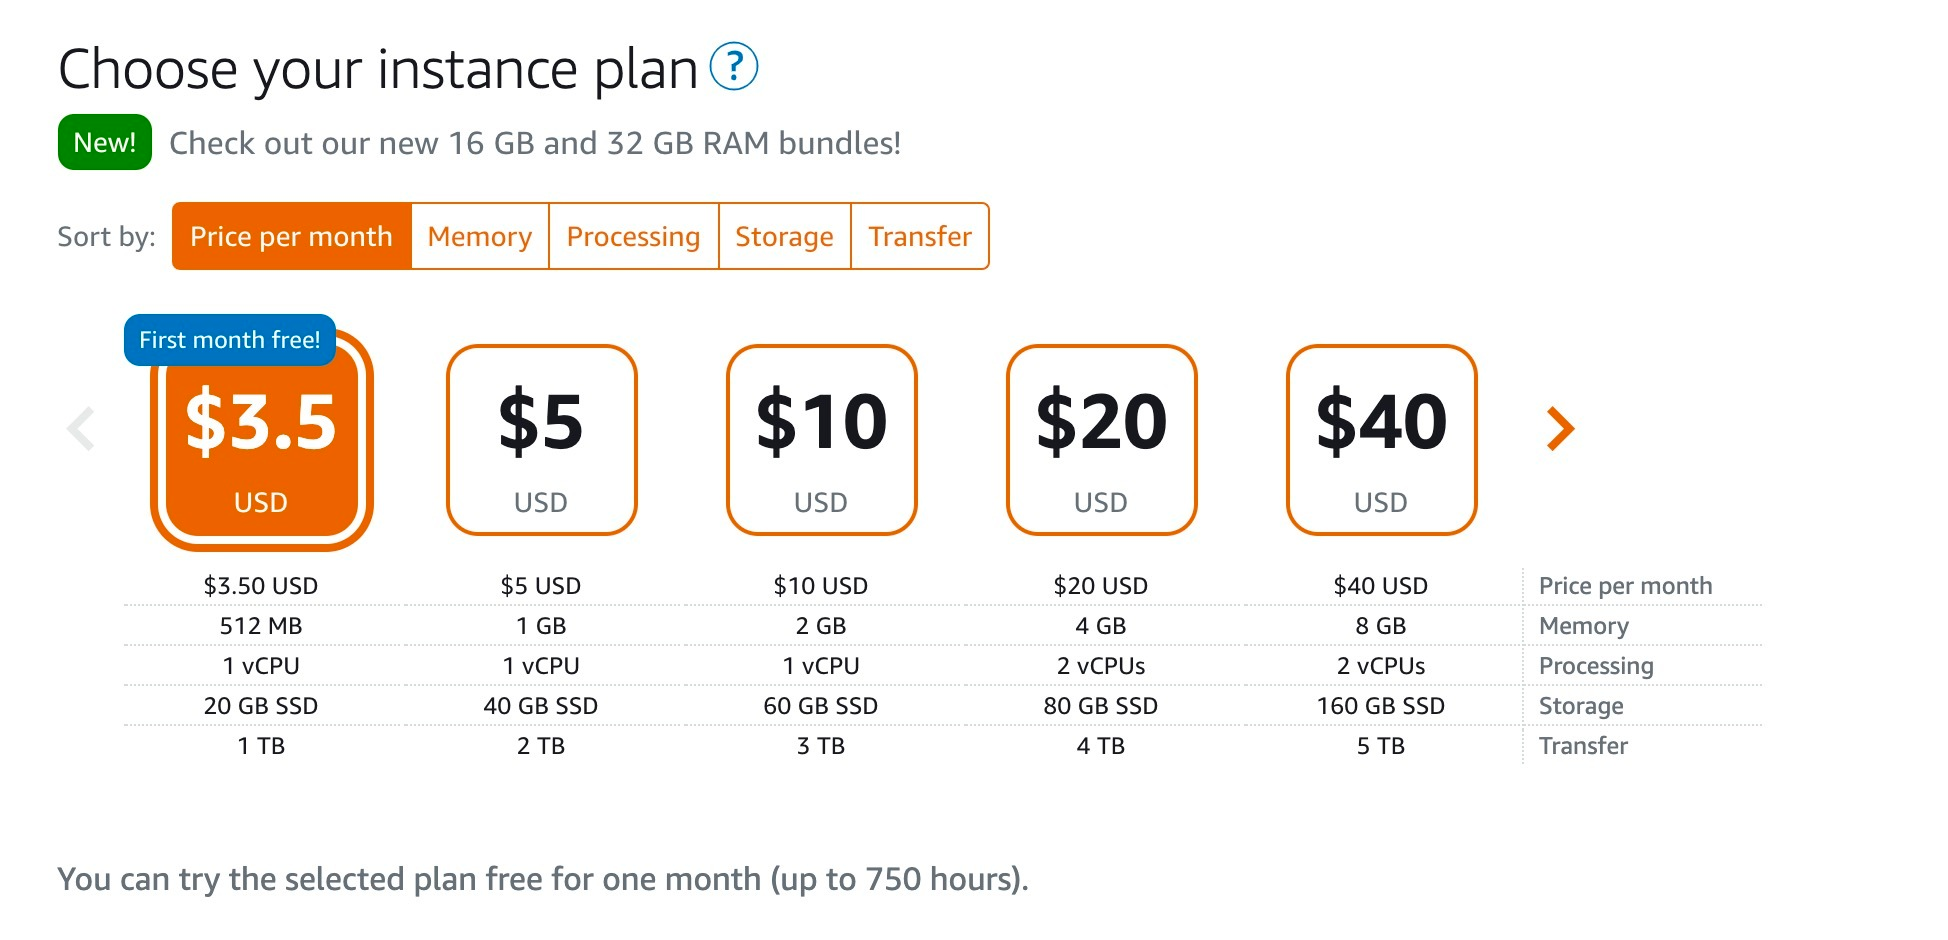
Additional parameters that can be added are custom launch shell script, new SSH key pair and you can enable automatic snapshots which will create daily backups of the machine. Be aware that automatic snapshots will bring some additional costs. The next thing to select is the instance type. This segment is very transparent and understandable, user can see the price of different instance types along with basic specifications: memory, processing, storage, and transfer:
The creation process will take a couple of minutes, and the WordPress instance is ready. The public IP address is provided, the WordPress instance is up and running, and you can start your blogging adventure. Be aware that the WordPress image provided by Lightsail is a Bitnami WordPress image. Bitnami is a company that creates predefined software packages that are easy to set up and run, and this means that users might have to deal with certain configuration steps that are specific to Bitnami.
Customization and monitoring
The final step in the setup process is fine-tuning the instance and making sure it’s capable to serve users.
Steps that need to be taken to finish the setup are:
- creation of static IP address – this can be done in a couple of clicks directly in Lightsail
- DNS setup – domain can be bought via Route 53, which is Amazon’s service for DNS management where you can buy your desired domain name and set up the DNS record
- Certificate installation – if you don’t prefer any particular certificate authority, Bitnami will provide you with the pre-built script which will help you with the installation and configuration of the certificate
To help you with the keeping eye on the health and the performance of the WordPress instance, Lightsail provides the Metrics section, where the user can observe the following:
- CPU overview and utilization
- CPU burst capacity
- Incoming/Outgoing network traffic
- Failure checks
Conclusion
If you want a very simple and cheap WordPress solution with basic monitoring capabilities and you’re already using AWS, Lightsail is the right option for you. Some pros and cons of this solution are:
Pros:
- very simple setup
- pricing transparency
- all-in-one package suitable for everyone
Cons:
- lack of customization possibilities
- eventually, you’ll need to take a look at Bitnami documentation to solve an issue
Useful links
https://lightsail.aws.amazon.com/ls/docs/en_us/articles/amazon-lightsail-quick-start-guide-wordpress
https://aws.amazon.com/getting-started/hands-on/launch-a-wordpress-website/
https://docs.bitnami.com/aws/apps/wordpress/
https://docs.bitnami.com/general/how-to/generate-install-lets-encrypt-ssl/