- Published on
Postman API platform – Part 2: Testing & Automation
- Authors

- Name
- Aleksandar Zeljković
- @a_zeljkovic
In the second article of the Postman API platform series, we are going to dive deeper into test scripting capabilities, pre-requisite scripts, and CI/CD integration.
Before we start
In this article, I am going to use requests made in the previous blog post. I’m still going to use Restful-Booker, but instead of public service, I am going to build the app locally. If you would like to follow along, you will need a Docker, and you can find a code and setup instructions on https://github.com/mwinteringham/restful-booker.
Tests
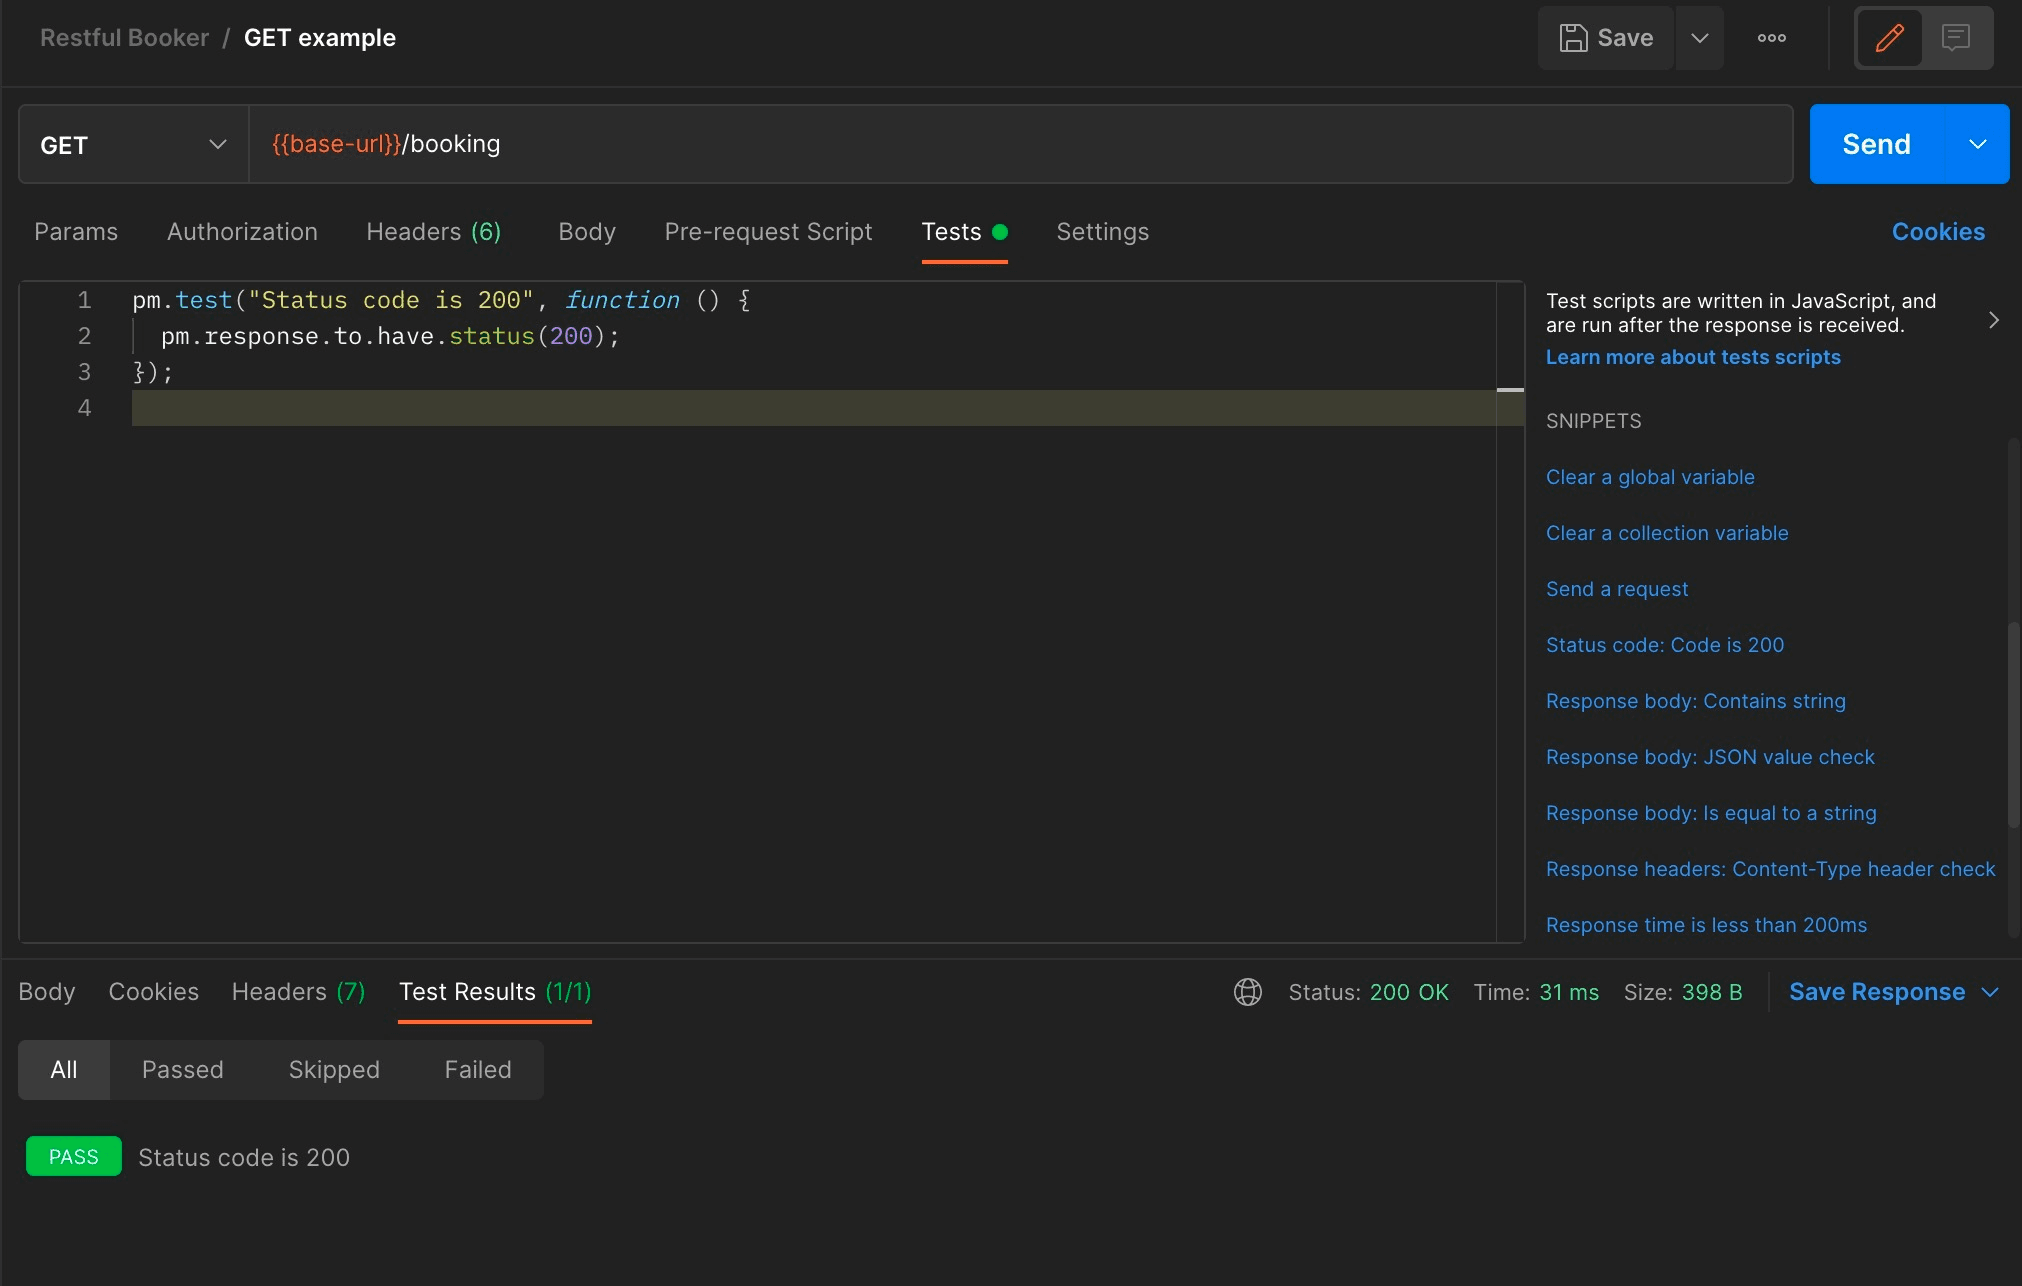
Let’s write our first test for the GET /booking endpoint which returns all bookings from the server. Tests are written in the Tests section of the request area. Tests are written in JavaScript and assertions are written using the Chai BDD assertion style. While JavaScript and Chai knowledge is not mandatory to catch up with Postman tests, it is highly recommended to have at least basic knowledge of both. On the right side of the editor, a link to a test scripts documentation is placed as well as basic code snippets that can be very helpful for basic test scripts. Usually, the first thing that we want to check with the HTTP request is the status code. Let’s use a snippet help for this first test case, by navigating to the snippets section and selecting Status code: Code is 200 snippet. The code snippet is immediately generated in the editor. The cornerstone of the Postman tests is the pm object, which allows us access to request and response data, variables and pm methods. Tests are executed immediately after the request is completed, so we can run our first test by clicking on the Send button. After the request is done, tests are executed, and results can be found in the Test Results tab in the response section:
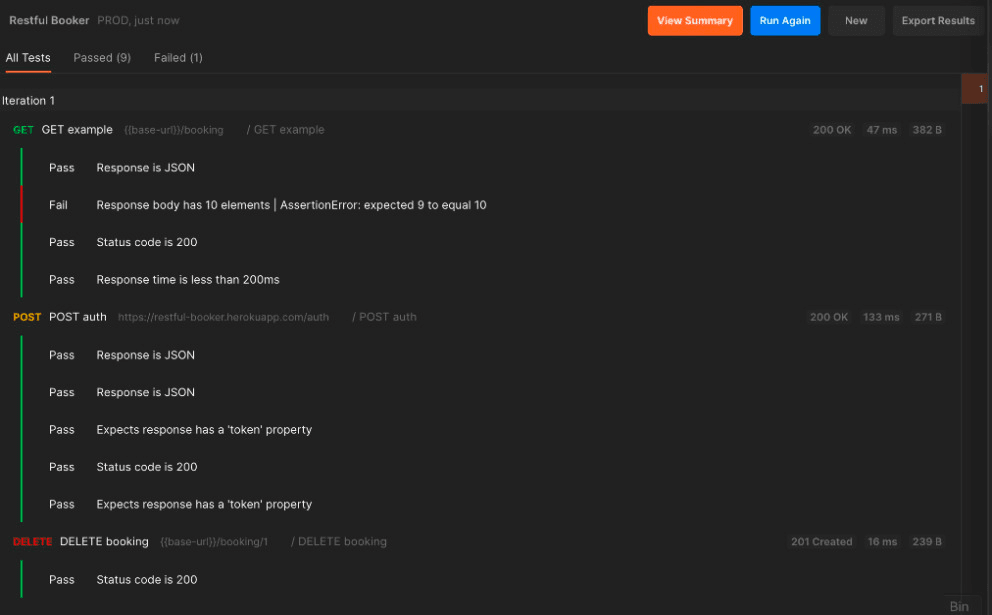
Now let’s make the same test fail by changing the expected status code to 404:
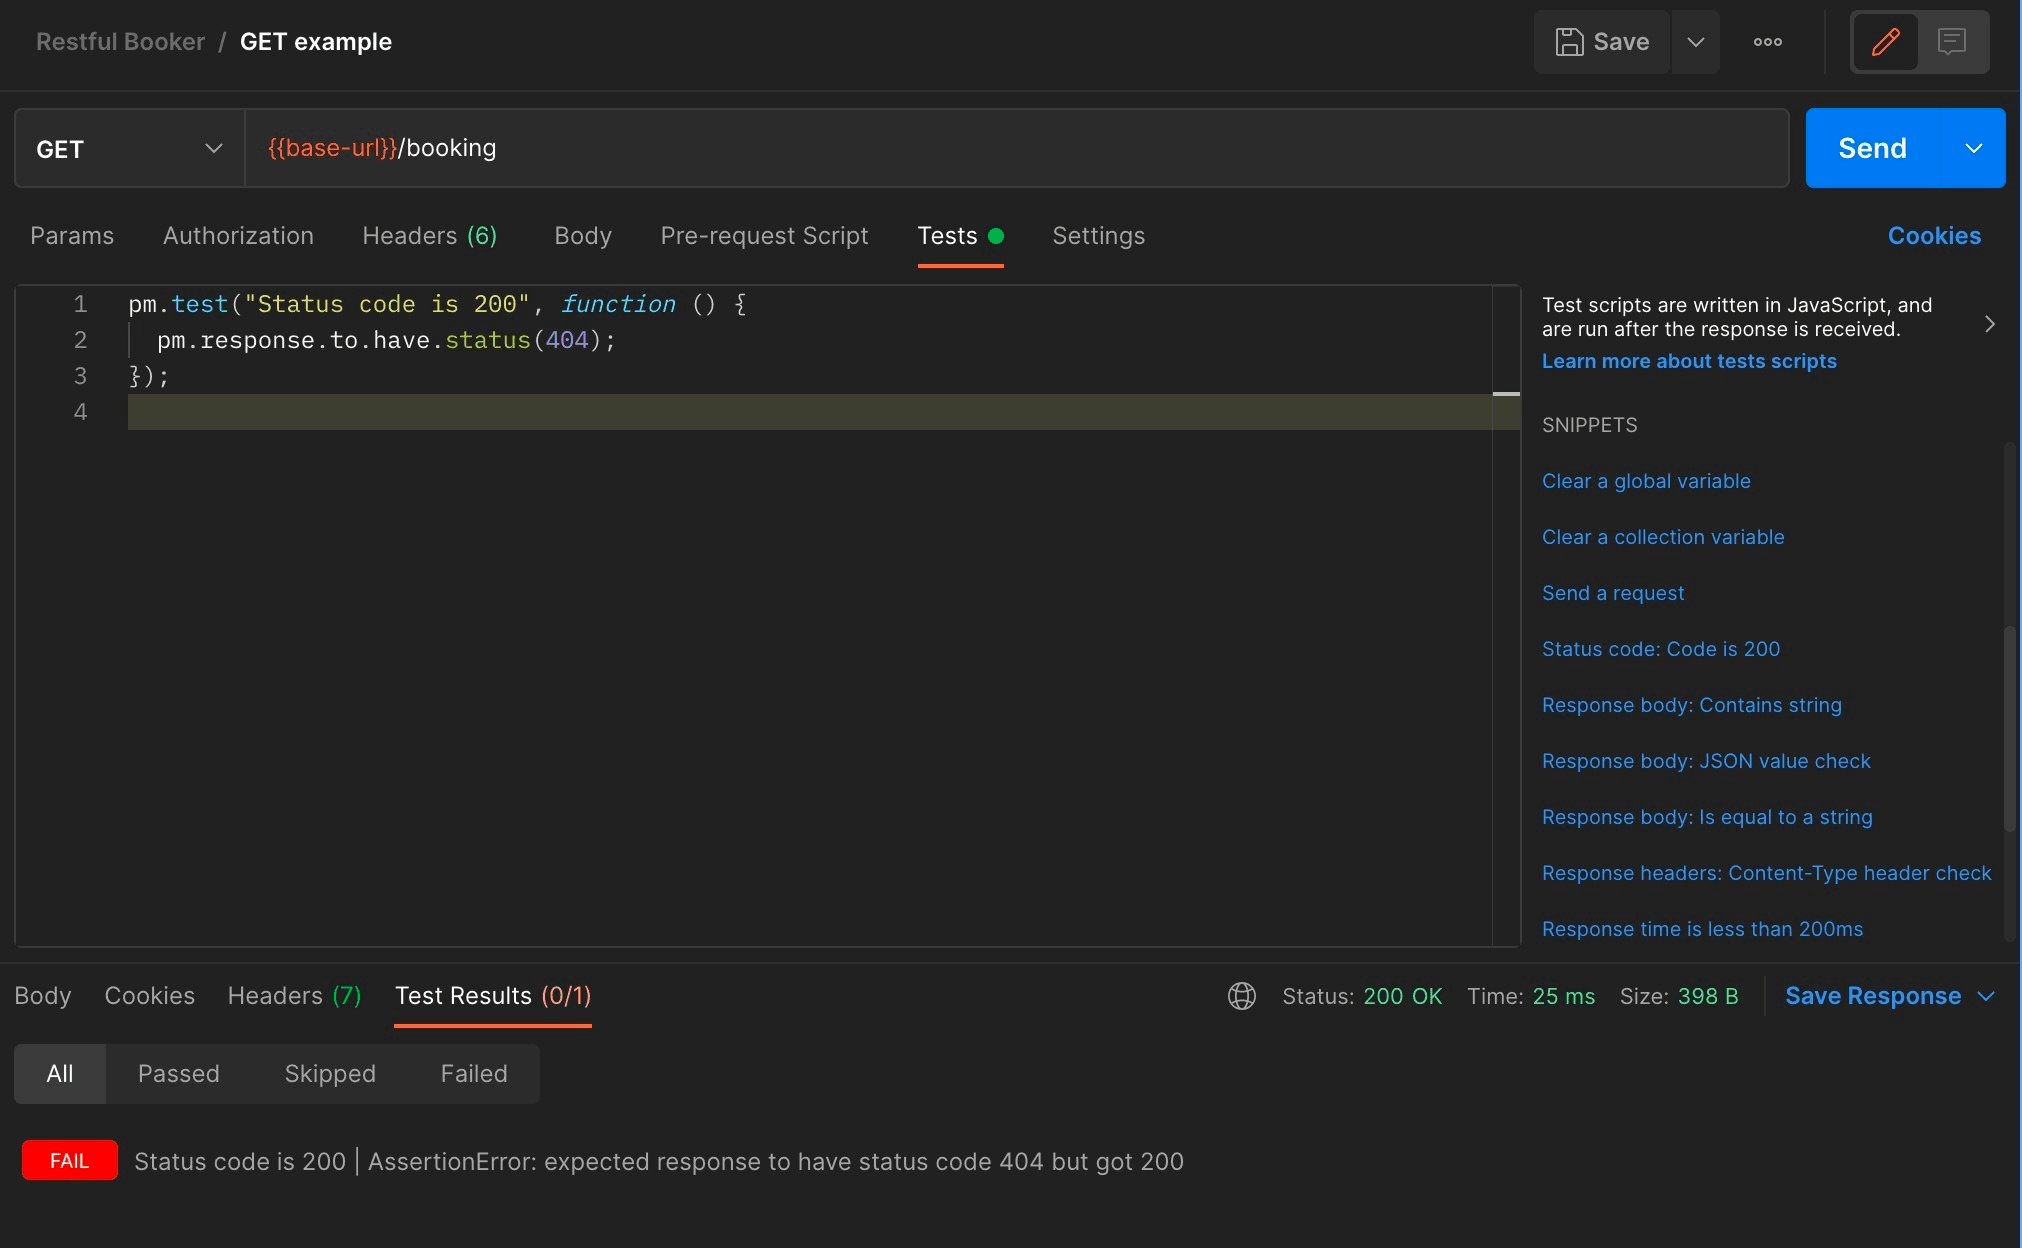
In this case, we can see which assertion failed the test. Now, let’s add a couple more tests for the GET /booking endpoint:
pm.test('Response time is less than 200ms', function () {
  pm.expect(pm.response.responseTime).to.be.below(200)
})
pm.test('Response is JSON', function () {
  pm.response.to.be.json
})
pm.test('Response body has 10 elements', function () {
  const data = pm.response.json()
  pm.expect(data.length).to.equal(10)
})
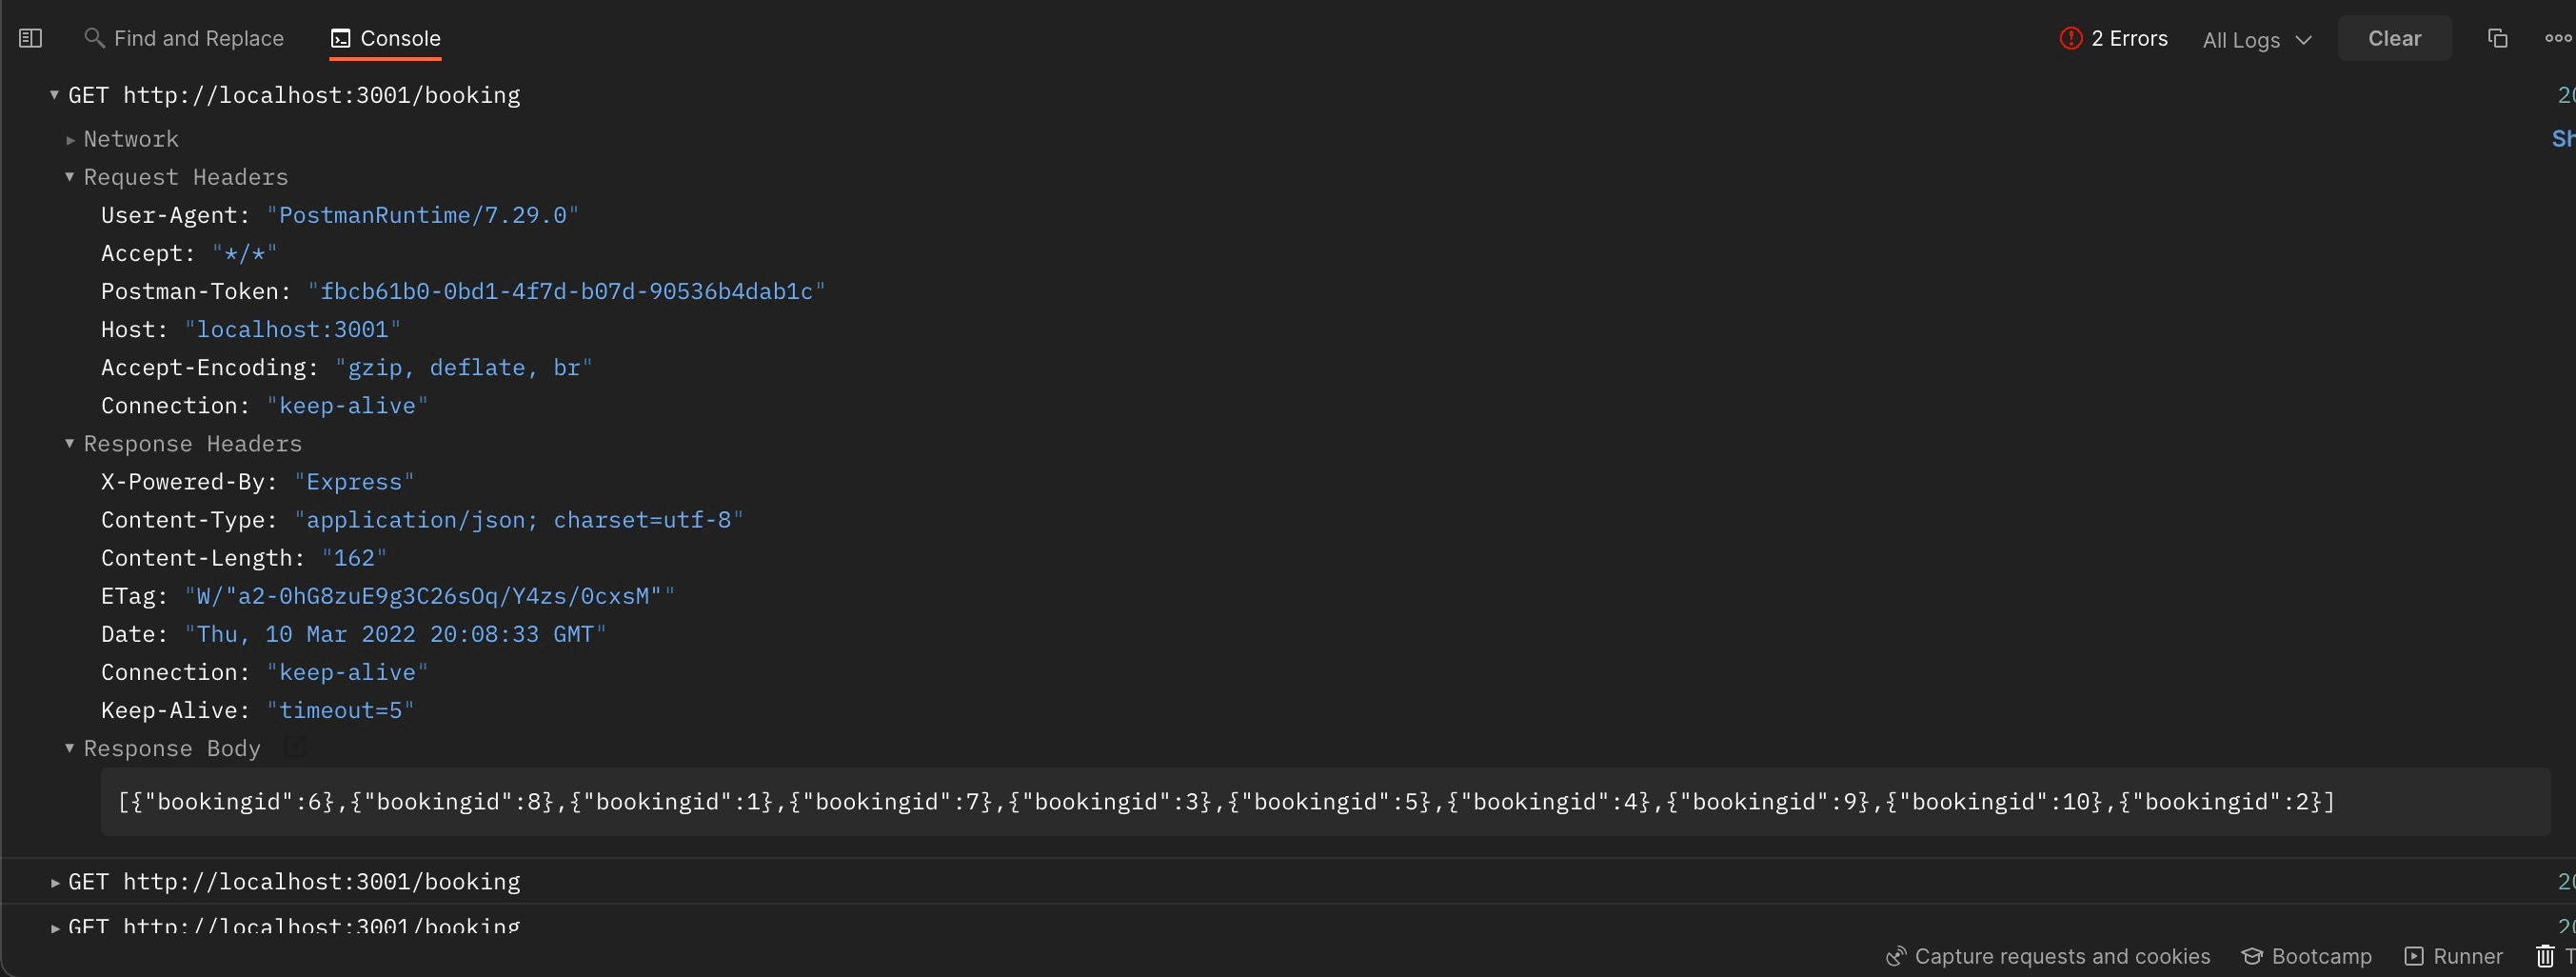
In case we need to troubleshoot tests or we want more information about the request, we can use the console to check more details about the request and response:
Pre-request scripts
Let’s create a simple test for DELETE /booking (we were running this in the previous article). Now, if you remember, in order to make this request, we need to authenticate. To do this, let’s add variables called username and password to our collection (left click on the collection -> Variables). Next, we are going to define 3 variables in our script that will contain the username, password and URL from variables:
const url = pm.variables.get('base-url') + '/auth'
const username = pm.variables.get('username')
const password = pm.variables.get('password')
Now let’s create an object to store all necessary data to make an authentication request (URL, method, headers and body):
const options = {
  url: url,
  method: 'POST',
  header: { 'content-type': 'application/json' },
  body: {
    mode: 'raw',
    raw: JSON.stringify({ username: username, password: password }),
  },
}
Finally, let’s make a sendRequest method that will send the request and save the authentication token to a variable:
pm.sendRequest(options, function (err, res) {
  var jsonData = res.json()
  if (err) {
    console.log(err)
  } else {
    console.log(jsonData.token)
    pm.environment.set('authToken', jsonData.token)
  }
})
In order to reuse the token and make a request, we are going to add a Cookie header with the value token={{authToken}}. Now we can add our tests for the DELETE request, and once we click the Send button, the pre-request script will be executed, the request will be sent, and finally, the test will run.
Running tests
In this section, we are going to describe three ways to run Postman tests:
- running tests manually
- running tests automatically via monitor
- running tests automatically via CLI runner – Newman
Running tests manually
If we want to occasionally manually trigger all our tests, we can do it by running the collection. This can be triggered by navigating to the desired collection in the collections list and clicking on the Run collection option from the menu (three dots).
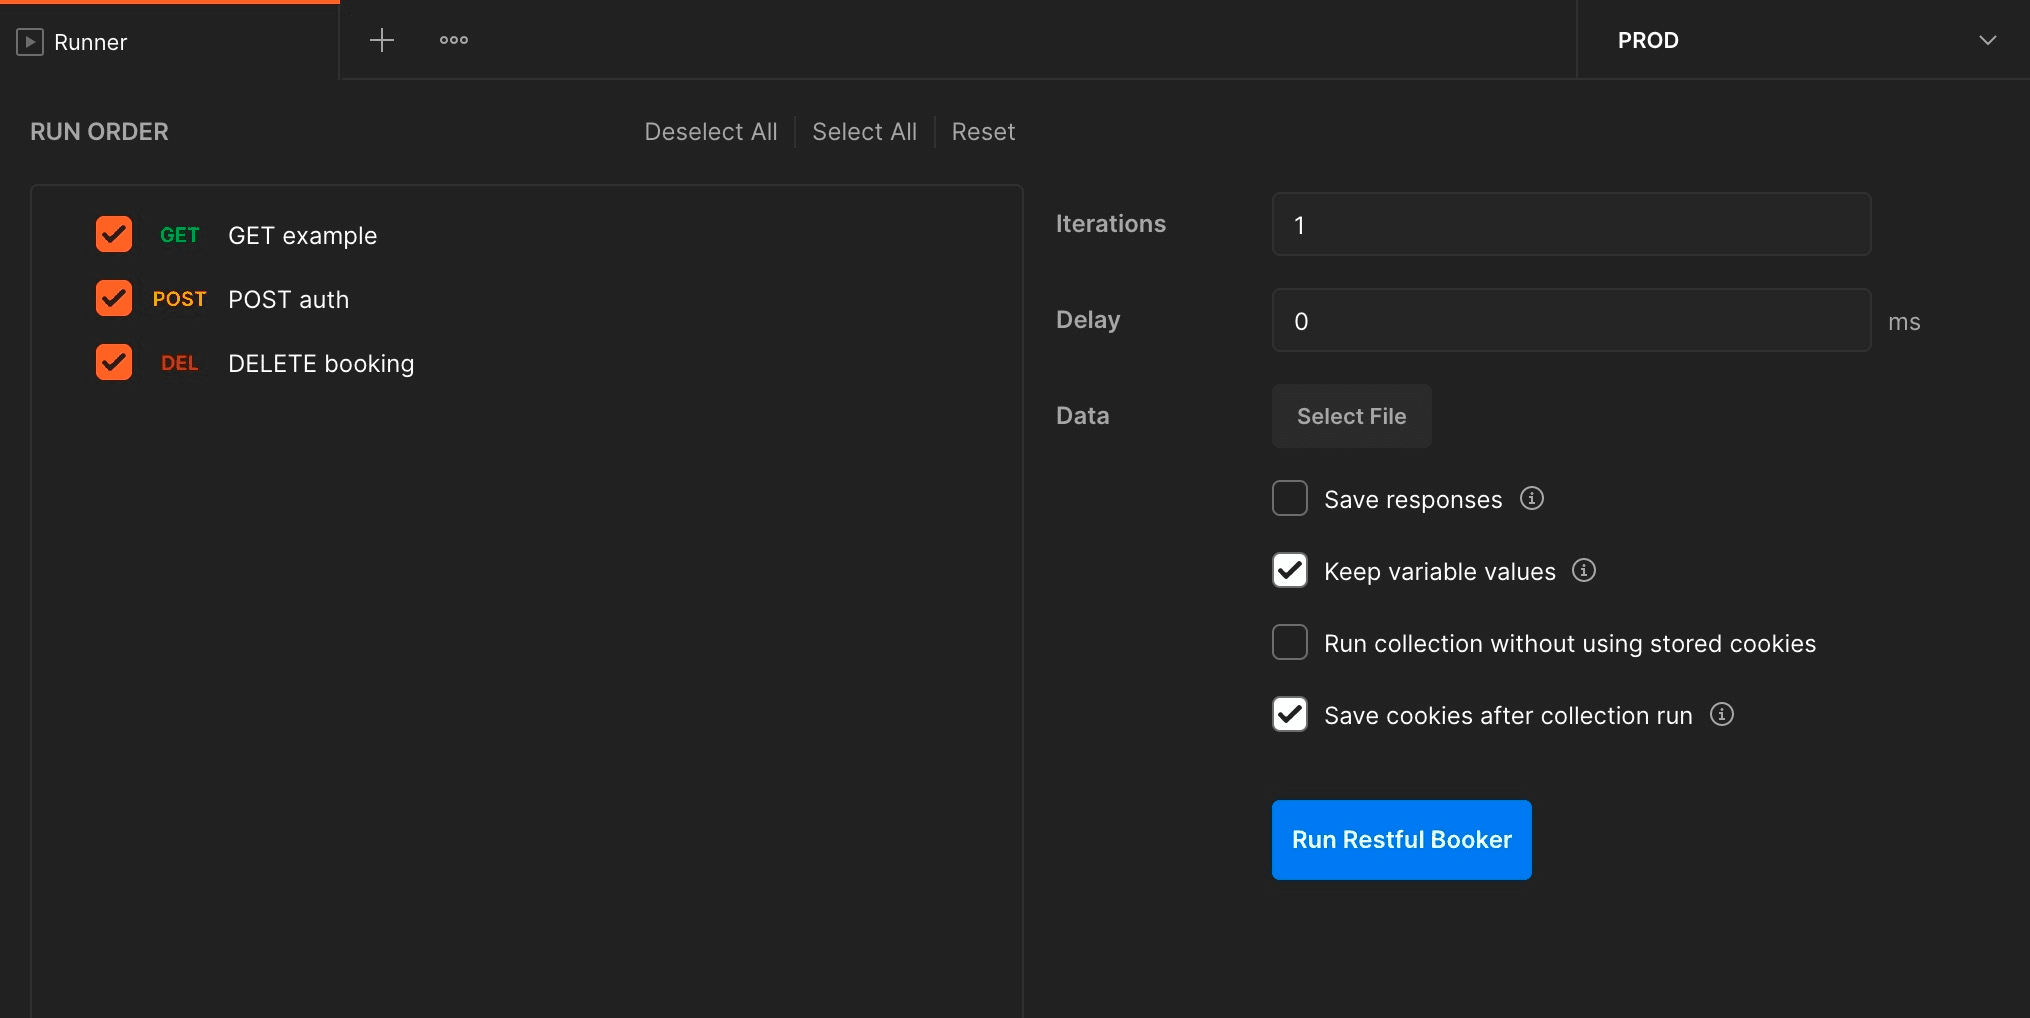
Here, we can customize our run by setting a number of iterations, delay between them, adding the file, etc. Once everything is set, we can trigger tests by clicking on the Run collection name button. Once all tests are executed, the dashboard with the test results is shown:
Running tests automatically via monitor
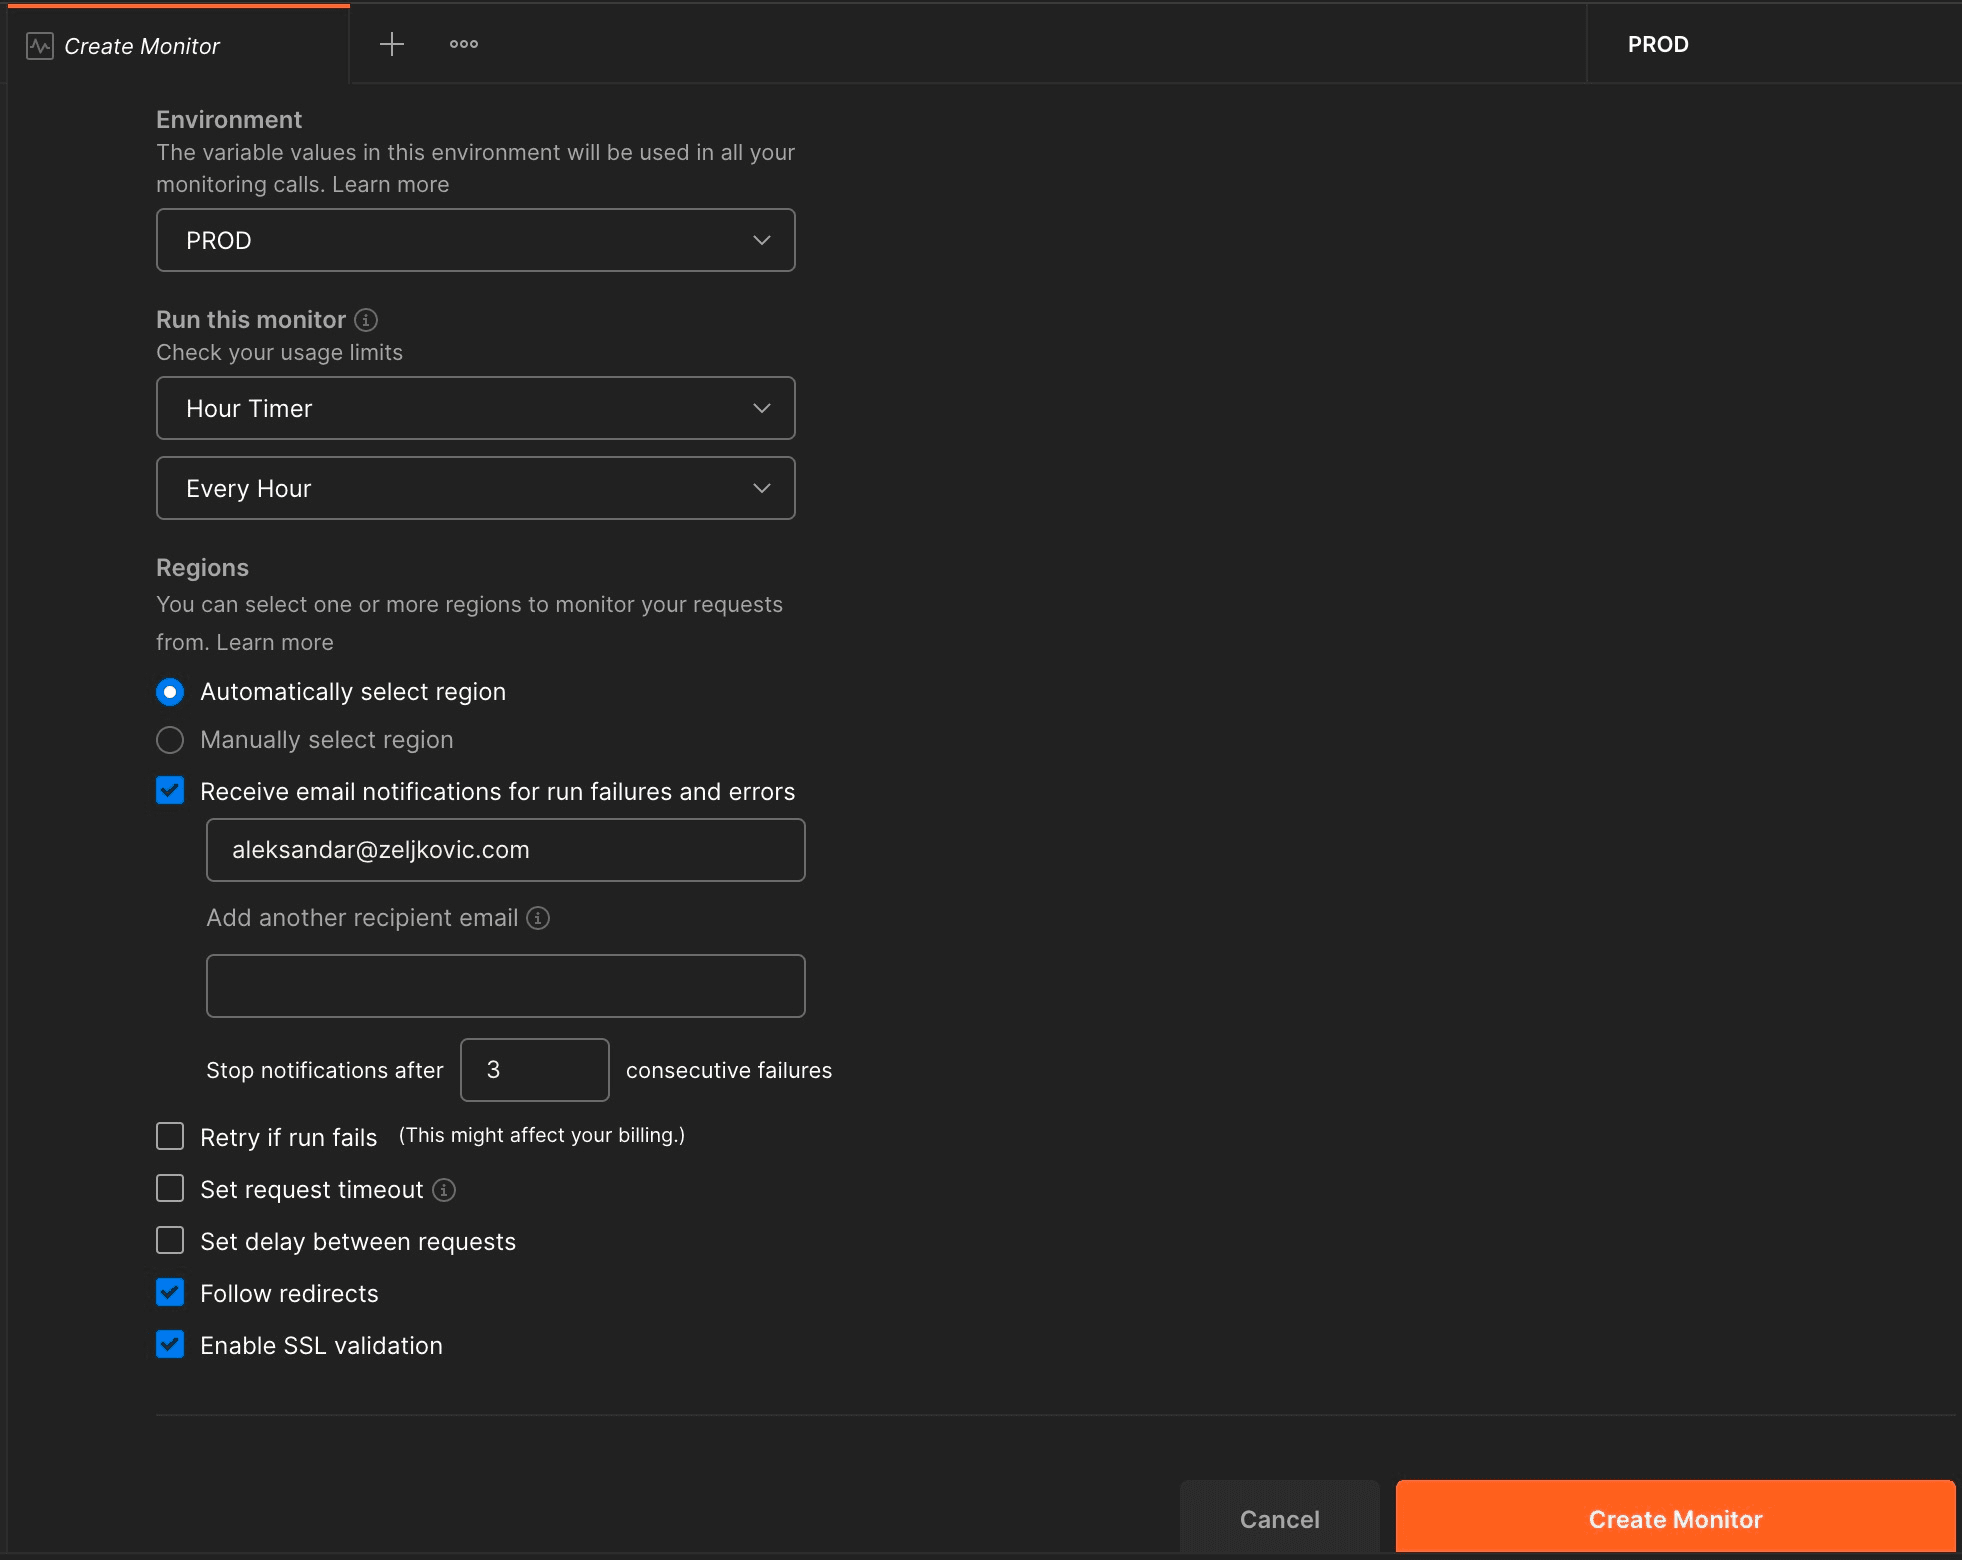
The idea behind the monitor feature is to have cloud runners that will periodically run API calls against user application in order to continuously check for health, functional, or performance issues. Let’s create our first monitor by opening the Monitors section from the left bar and clicking on Create a Monitor. Here we need to set a name for our monitor, select the collection to run, select our PROD environment. Further, we need to set how often will monitor run, runner region, email address for failure notifications, etc.
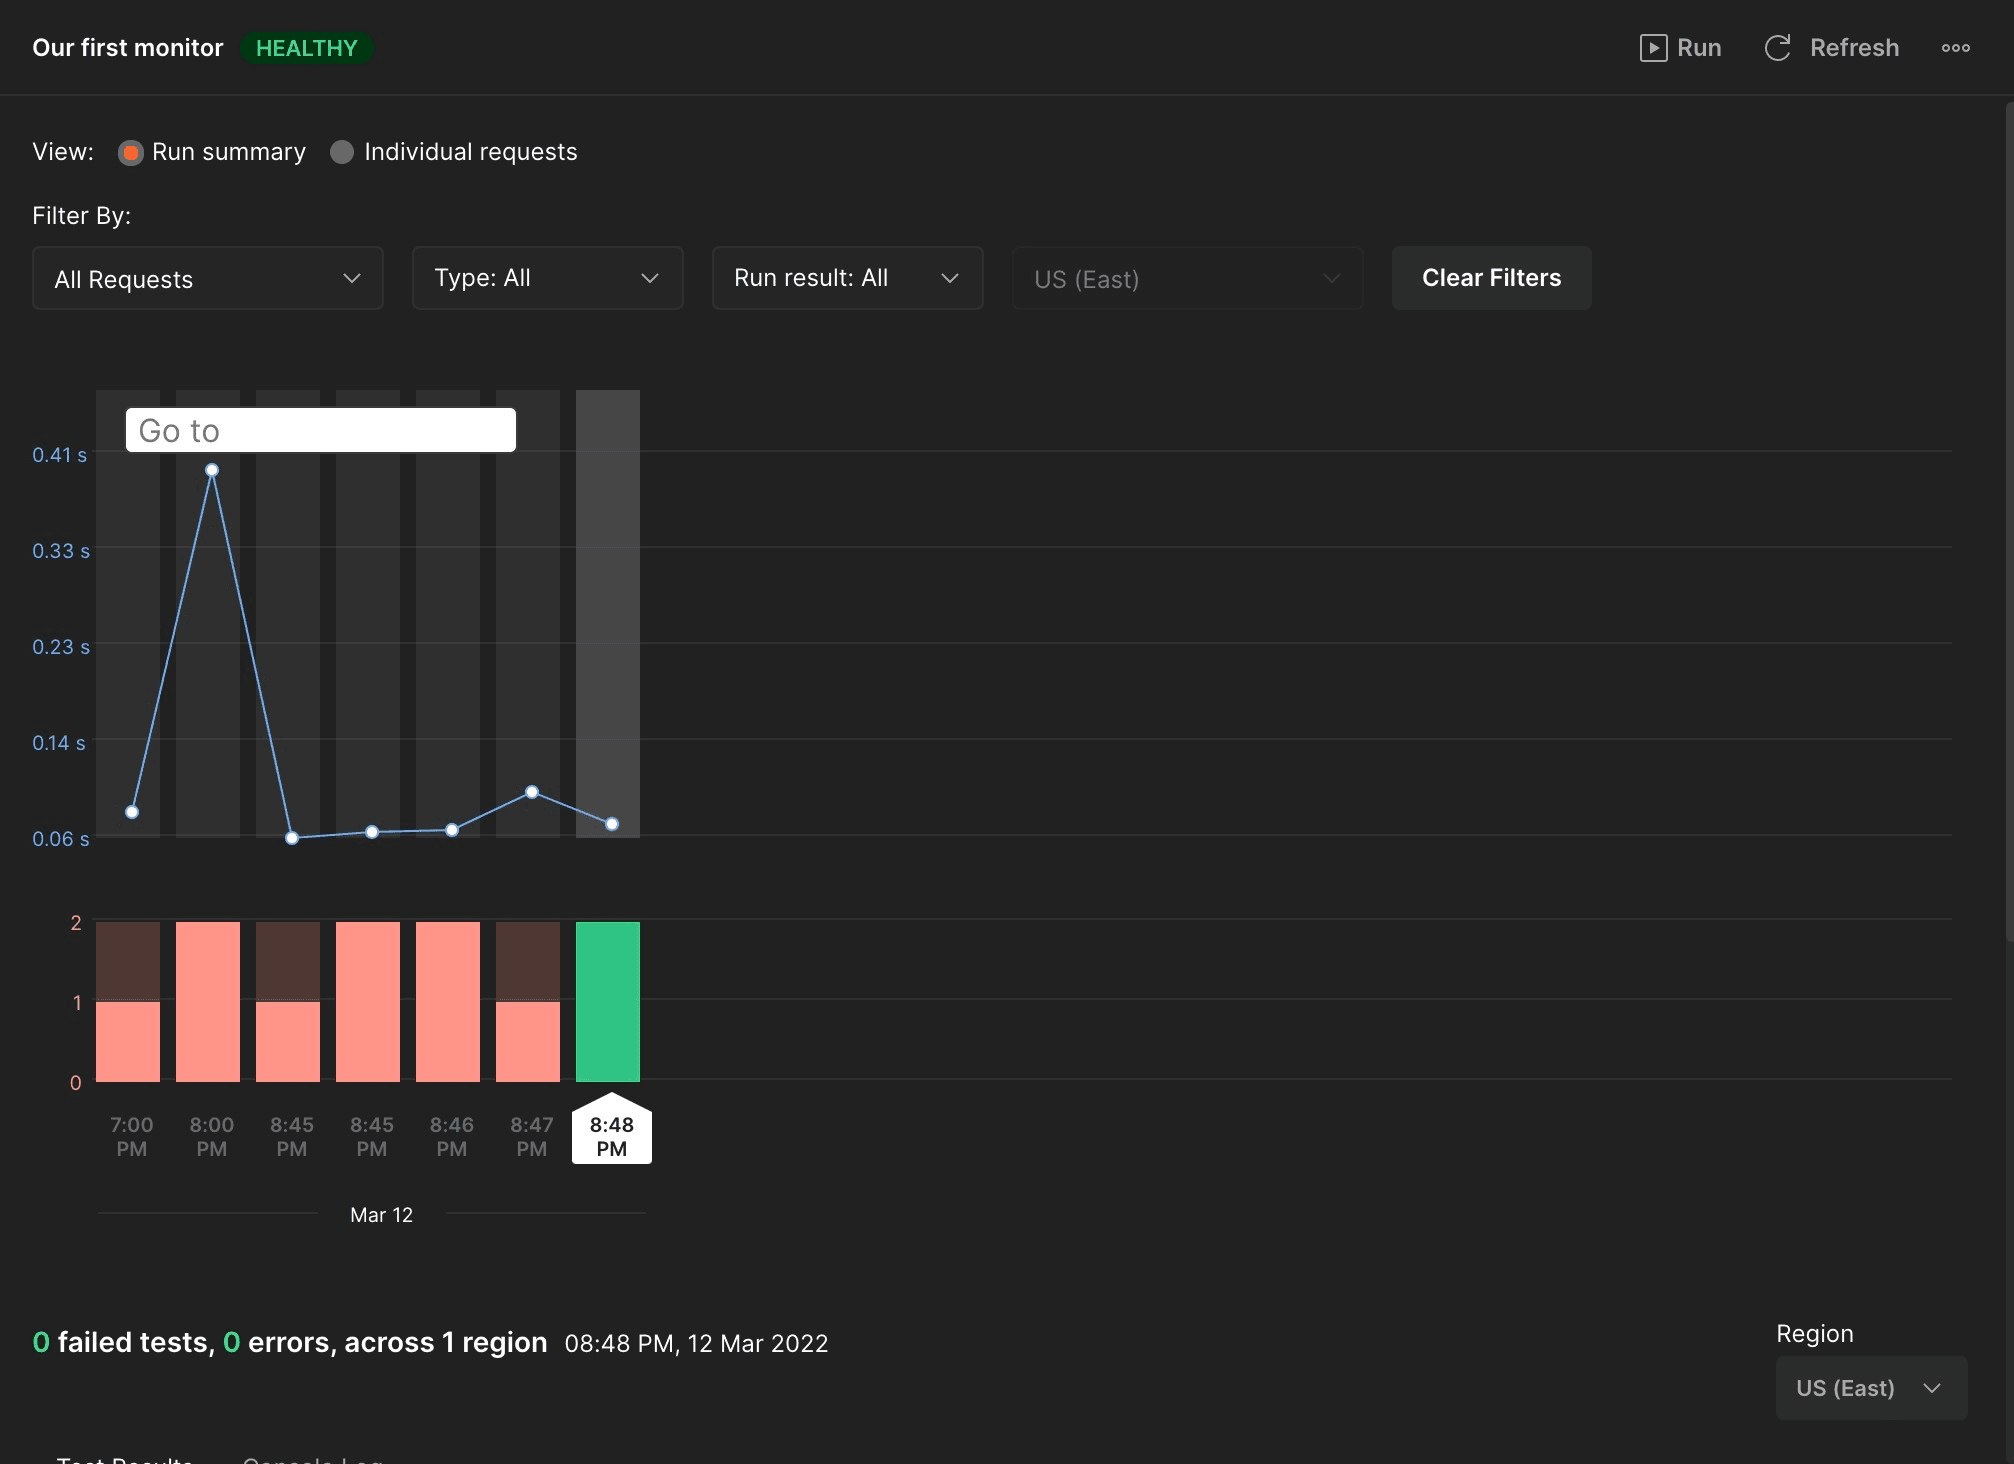
After we created a monitor, we can run it manually, or it can run automatically based on a set schedule. After several runs, we are having a dashboard with test result trends with a detailed report for every test. These reports are also being sent to an email address, in case we left one during setup.
Info: Free accounts are limited to 1000 monitoring requests per month. If more than this is necessary, paid plans should be considered.
Running tests automatically via CLI runner – Newman
Probably the most popular way to run Postman tests in an automated and CI friendly manner is a Newman CLI runner. Newman can be installed via npm:
npm install -g newman
In order to run our collection via Newman, we need to export it first via the collection menu. Next, we need to export our environment variables. This can be done by opening our environment from the Environments section, then selecting the three dots menu (next to the Share button). Once this is done, Newman can be run with the following command:
newman run collection_file.json -e environments_file.json
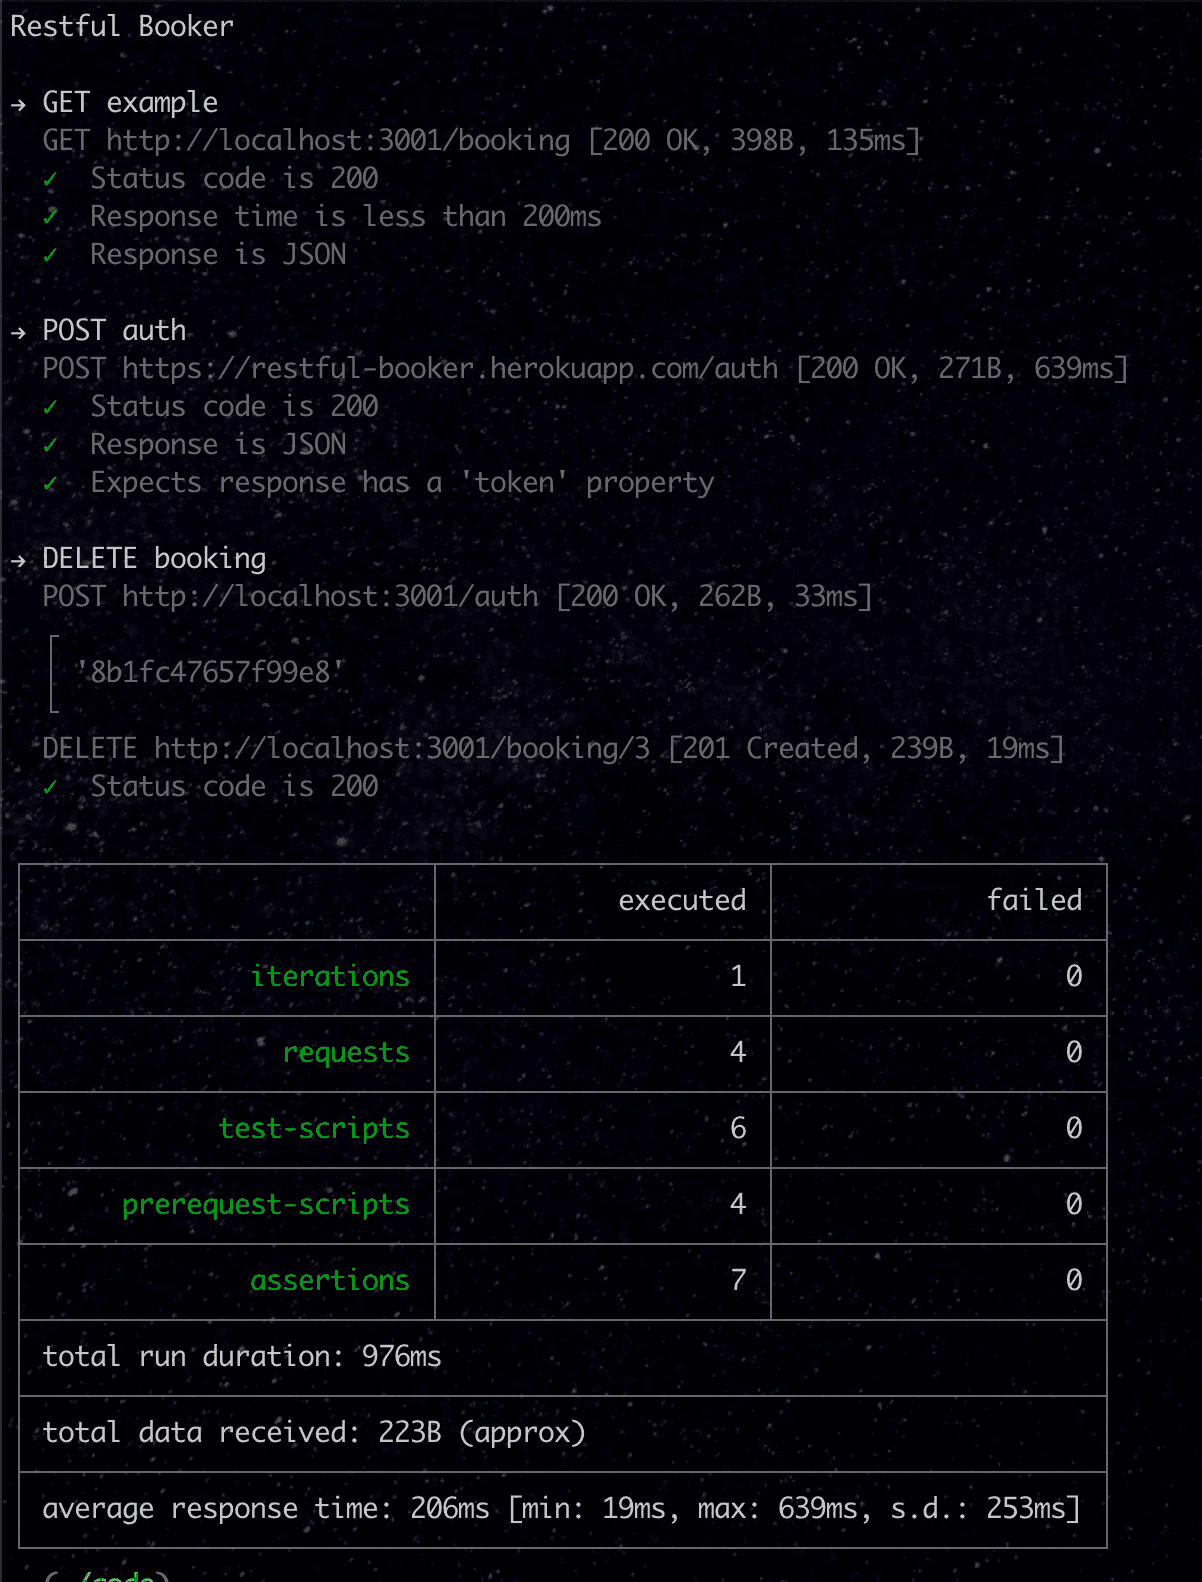
Newman will run all tests and the results will be visible on the console:
To get a nice HTML report with the test results, we are going to install Newman HTML Reporter:
npm install -g newman-reporter-html
Then we can run the same run command with -r (reporter) parameter at the end to get both CLI and HTML reports (-r cli,html). This way we are having an HTML reporter that can be used for a better overview of the test results.
Conclusion
In this article, we went through the process of writing pre-requisite scripts and tests in Postman. We also briefly investigated the monitors feature. Finally, we ran our tests via Newman client which enabled us to run tests as a part of the CI/CD pipeline.
Useful links
Postman/Newman:
https://learning.postman.com/docs/writing-scripts/intro-to-scripts/
Restful-Booker: